A Month of Being Thankful


We packed up our critters ( a few stayed home thanks to our awesome pet setter) and went home for a solid ten days. I think this time of year is especially beautiful here; with frosty clear days, changing colors and bare orchards.   I am so thankful to be in this beautiful place, for all the gifts and blessing god has put in my life and for the people he has put in my path. 

I hope that where ever you find yourself, you can enjoy the beauty of the natural world god has created. That you can find good things in your life to be thankful for, regardless of your situation. And, that you can find peace in this world filled with turmoil and grief.

Many of my Facebook friends did daily posts for things they were thankful for this month.  I decided it would be nice to just compile a list to post on Thanksgiving instead. I would love to see the things you are thankful for in the comments!


28 Days of Thanks


 1st For the little things that remind me why life is so precious.

 2nd  For sunshine when there have been clouds.

3rd  For meat in our freezer that was produced in a way I can be proud of and happy to feed to those I love.

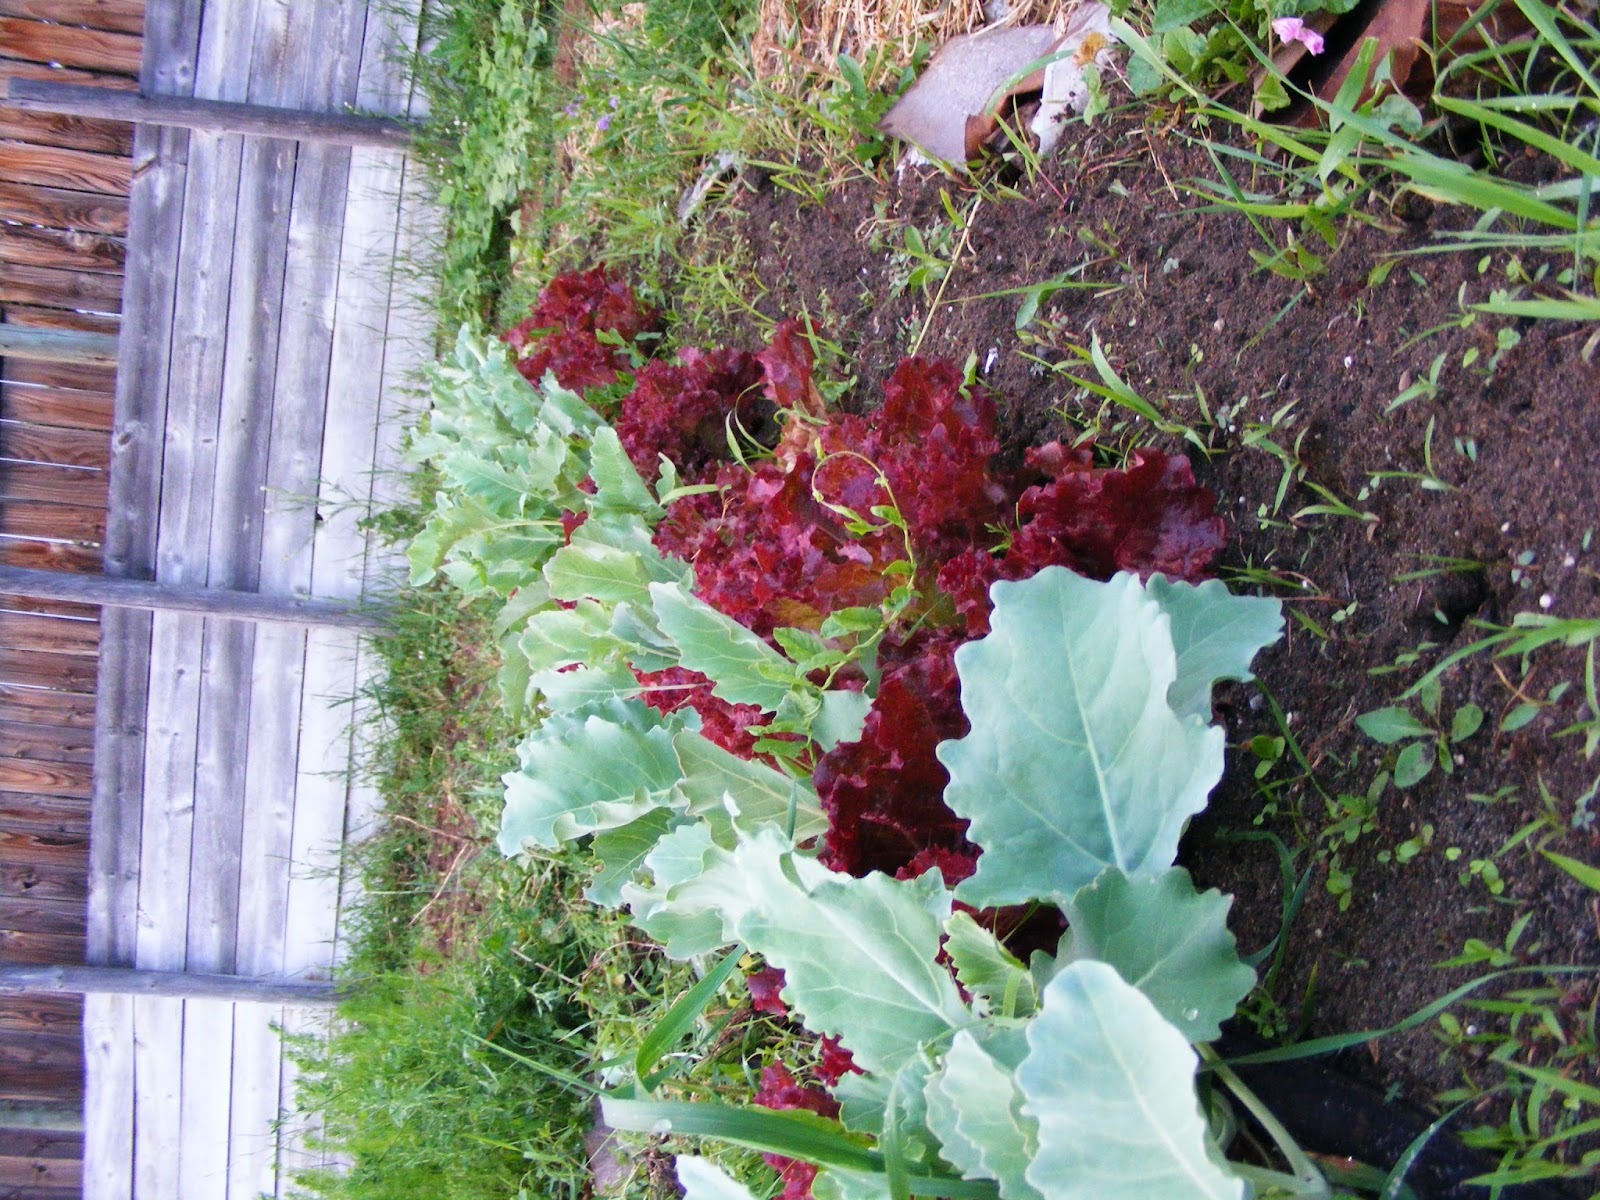
4th  For productive gardens and wild lands to forage and the knowledge to use both to the advantage of nature and my family.  


5th  For my childhood. It was far from perfect but I would not be who I am today or able to help people as I can without having lived it.

6th  For a college that has opened my mind, strengthened my passions, compassion and continues to make me a better person daily.


7th  For meals created, cooked and eaten with loved ones.


8th  For the kindness of a stranger, and being able to be that stranger.

9th  For having conversations with people who have completely different world views than me, and for how it broadens my understanding of life.
10th  Conversations among like minded folks that feed my soul.

11th    The people in the armed forces and their families. I am grateful for the sacrifices they make regardless of if I agree with the reason they are fighting. 

12th  For my husband. I had no idea life would turn out this way; god has truly given me my perfect match; a man better than I could have ever imagined. 

13th  I am thankful for seeing god in all places and things, I am always awed by what he has created.
14th  For growing things.

15th  changing seasons.

16th  Stocked pantries.


17th  For all the critters in my life, they make it better in so many ways; Especially with lap-fuls of furry cuddles and eyes that look at me with far more knowledge than we give them credit for being capable of understanding.
18th  For my snugly man.

19th For a husband that walks, talks and
 has his health. Every day I thank god
 that he has spared AJ so many times.

20th    For phone calls from far away loved ones.

21st The beauty of hand written letters.

22nd  The pleasure of books, papers and all written and typed words.

23rd  The amazing knowledge I have access to through this crazy invention called the internet


24th  For having a home, a place, family and community to come back to.


24th  For this age of change and possibilities we live in.

26th  All the lessons I have learned from the bad days.

27th  For all the memories from the good days.

28th  For today, no matter what it brings.

                    
Happy Thanksgiving and Hanukkah!

What are you thankful for? I would love to read them in the comments!
This post is participating in the Homestead Barn Hop, check it out to find other great blogs like ours!

Homemade Tator-Tots From Scratch


I’m not the biggest fan of tater-tots. That may shock you since here I am telling you how to make tater-tots from scratch. I am however a very big fan of breakfast burritos and you can’t have those without tater-tots.


The first thing you need to do, either early the day you plan to make the tater-tots or the night before, is to cook the potatoes. You want them to be cooked just to the point where they no longer have that crisp, starchiness of a raw potato. I bake mine but microwaving or steaming would probably work fine too. I would be hesitant to try boiling because it might make the potatoes too wet to stick together properly or too soft to have the right texture.


Once the potatoes are no longer crisp stick them in the fridge to fully cool. If you are impatient you can also put them in the freezer for a little while, maybe set a timer or write yourself a note so you don’t forget about them. Letting them cool all the way will make the potato keep their shape better when you grate them, which is important if you want a texture closest to store bought tater-tots. You could also use leftover baked or fried potatoes; the texture will just be different, creamier and less chunky. 

Now you need to peel and grate your cooled potatoes. I use my grater attachment on my Cuisinart but a flat or box grater will work just fine. I think a ricer might work too but I haven’t had the opportunity to try it. If you don’t have a shredding disc and still want to use a food processor you could try just pulsing with a regular blade. It should work but you will probably have to work in smaller batches and be very careful not to cream your chunks. 
Do you see the creamy blob? That was because my potatoes were just a little too cooked this time. The potatoes are quartered so they fit in the Cuisinart feeder tube.


Now you add beaten egg to your grated potato until all the potatoes are coated with egg and starting to stick together. The ratio of egg to potato is: 2 large eggs per 3 medium potatoes. The number of eggs needed will depend on your potatoes (how cooked, dry, large) and eggs (size and if they have been frozen). 


This was a thawed and beaten egg, the texture is a little strange but they work fine.
Add your seasoning. I use salt pepper and garlic but you can be creative and add whatever you like. You could even add bacon, cheese, garlic, onions or some other tasty thing I haven’t thought of. 


Add in your bread crumbs and flour last. I used about a 1/8 cup of bread crumbs per 3 medium potatoes and maybe 3 tablespoons of flour. Once again depending on your eggs and potatoes, as well as your flour and bread crumbs, you will need more or less. You want dough at the end that is sticky and will form a nice mound when passed back and forth between spoons. 


Breakfast burritos are the way we use tater-tots. It’s our early morning fast breakfast, because of that we fully cook our tater-tots before freezing. I decided to see what they turned out like if frozen uncooked and then baked.
 I have some in the oven right now and it’s not looking promising folks. They’ve been cooked at 350°F for 45 minutes. As of right now even the ones I tossed in olive oil aren’t browning and they are not at all crispy. It took about an hour for them to finish, they came out with a really strange texture. The outside is really chewy and the inside is very soft. I think at least a little bit of frying before freezing is necessary to get the typical tater-tot texture.  If you guys want to try freezing them raw, be my guest but I’m not going to put my vote of confidence behind it.


To cook them I pan fry in a ¼ of fat, I prefer lard but you can use whatever frying oil you prefer. You can also deep fry them, I don’t since I feel like it wastes a lot of oil, and I hate wasting things. Just turn them until all the sides are nicely brown, then let them cool and drain. Undercooked ones are fine for freezing since they will finish cooking in the oven, it just means they will take longer. Make sure to do just a few in your first batch and use them as your taste-testers so you can adjust the seasonings to your preference.
As you are heating your fat, shape your tots and lay them out on wax paper.  They are sticky little buggers but if you are careful doing it this way makes the process a lot faster and you are less likely to over heat the fat between batches. 


I use my flash freezing method to freeze these. Spread your tater tots out in a single larger on baking sheets or pans and pop them in the freezer. In about two hours they will be hard, then you can bag them up. By freezing them before bagging they won’t be stuck together. You will be able to take out just what you need at one time without having to bash a bag of frozen things all over your kitchen. 


To heat them up I put them in a 350°F - 400°F oven in a single layer on a baking pan. When they are hot through excess fat will sizzle out all beautiful like. 


I hope you guys like these. And yes, if you were wondering, I'm going to do a sweet potato-tot recipe soon. I bet you guys could pretty much figure it out on your own though. As always, I love to hear from you in the comments!


This post is participating in Real Food Wednesday , Homestead Barn Hop,and this Homestead Barn hop, Healthy Tuesdays and Mostly Homemade Mondays Blog hops, check them out to find other great blogs like ours!

In 240sq feet: Real Food the Small Way


A draft of this post has been setting as just a title, an idea, since I started Life From Scratch. Cooking from scratch and preserving food is a daunting task to undertake for the first time under any circumstances. In conversations with people about scratch cooking and food preservation they often say, oh when I have a big kitchen or a bigger house, or this or that kitchen tool, I will start doing that stuff. Or they flat out say they don't have the space, equipment, time, energy; for any of that. I would like to bring some perspective to those comments and some inspiration to use the space you do have to the fullest.

When AJ was able to get around on his own again (don’t know what I’m talking about? Read the About Us page) we started looking for a place so I could start back at college the following quarter. We had (and still have) a very very limited budget. We almost gave up and rented a room in a house instead. Finding this place was a blessing.  We live in a studio apartment in a boarding stable on a rural 100 acres. It couldn’t have worked out better. We have horses for neighbors, everyone here is some level of animal crazy, we can have our menagerie and no one cares and we have our own space to call home. 


The problem is, this apartment does not have a kitchen. No stove. No oven. Don’t even think about a dishwasher. The toilet is in the kitchen and there is just one tiny shallow sink. 

Now maybe you are thinking, wait a minute…you can, bake and pickle and everything?! Do you go somewhere else to do all that? No, my friends. When we moved in here I did some research and we bought this convection toaster oven and a hot plate. I do all my baking in the toaster oven and use my hot plate just like a (very slow-to-heat) stove top. We also have crock pots, a bread maker, an Aroma rice cooker, and a small barbeque that augment our cooking abilities. I use the bread maker just for making dough on a rare occasion and the barbeque is a new addition that I haven’t got to use much yet. 

Our apartment is 240sq feet, including everything and rounding up; I think the pictures make it look bigger than it really is. Figuring out how to fit a functional household worth of “stuff” for two people and their critters in here has been a sharp learning curve. We figured out pretty fast that wall space is valuable real-estate. We hang most of our numerous jackets and a lot of my pans and kitchen utensils. Shelves, closets and cupboards have to be organized by what we use the most and least, with the things we use least the hardest to get to. We do also have a cubby in the hayloft along the edge of the apartment where we store our canning stuff, storage crops and animal equipment. Our fridge(s) live just outside the door since there is nowhere inside for it to go. 
Living in a tiny space creates some unavoidable frustrations. The floor is only clean right after it’s been swept and mopped. If you want any space to work in the kitchen (or need to get into the freezer) the dishes have to be washed and put away before the next food preparation happens. Sometimes, some things just don’t have anywhere to be but on the floor.  

Living here has made me come a little more to terms with the fact that perfection is not attainable. In fact, sometimes in striving for perfect we end up strangling our ability to do any better than we already are. If you find yourself throwing your hands in the air and thinking; why bother! Check yourself. That is your perfectionism strangling any chance you have to improve the situation.

 Moving in here I was worried. I didn’t know how I was going to make it work and I found myself fantasizing about asking friends if I could do big cooking and canning projects at their house. I realized I was crippling my ability to innovate; to make the best out of what we did have. 

Necessity is the mother of invention. Before any innovating can happen you have to decide that it can be done; that you will figure out a way to make it work. Don’t stop to ask if it’s been done. If you do, you will get waylaid by the naysayers and never get the chance to find a way to make it work
 I really don't want anyone to see my tiny cramped home. However, if sharing some less than pretty photos can make someone realize how good they have it and inspire them to make the best of what they do have then I can grin and bare a little shame. I will be so glad when we are in a real house again with a real kitchen.  I’m just not going to let my desire for a nice, fully equipped kitchen prevent me from making and eating the good, homemade, soul and body feeding food that we all deserve.


Below are some more random photos of where and how we keep some of our things. Hopefully they're inspiring not terrifying. As always, I love to hear from you in the comments!


This post is participating in the Homestead Barn hop, Mostly Homemade Mondays, Frugal Days, Sustainable Ways, Real Food Wednesdays, HomeAcre, From The Farm and Healthy Tuesdays blog hops, check them out to find other great blogs like ours!